Table of Contents
ToggleA single-wall kitchen isn’t a compromise, it’s a smart, efficient layout that works especially well in tiny homes, apartments, and open-concept spaces. Whether you’re renovating a cramped galley or designing a studio from scratch, understanding how to maximize a one-wall kitchen means making every square foot count. This guide covers practical strategies for layout, storage, lighting, and color that transform a tight kitchen into a functional, pleasant workspace. No fluff, just real solutions homeowners and renters actually need.
Key Takeaways
- A single-wall kitchen layout optimizes efficiency by keeping the refrigerator, sink, and stove within arm’s reach and reducing plumbing costs compared to larger kitchen designs.
- Strategic vertical storage through full-height cabinets, floating shelves, and wall-mounted systems transforms a tiny kitchen by maximizing every inch without sacrificing counter workspace.
- Maintain proper spacing of at least 24 inches on each side of the sink and 18 inches beside the stove to ensure safety and usability in your one-wall kitchen.
- Neutral to cool-white lighting (3000K to 4000K) combined with light-colored cabinets and countertops makes small kitchens feel larger and more functional.
- A mobile cart or fold-out table positioned adjacent to the kitchen can extend prep area when counter space is genuinely limited in compact kitchens.
Understanding Single-Wall Kitchen Layouts and Their Advantages
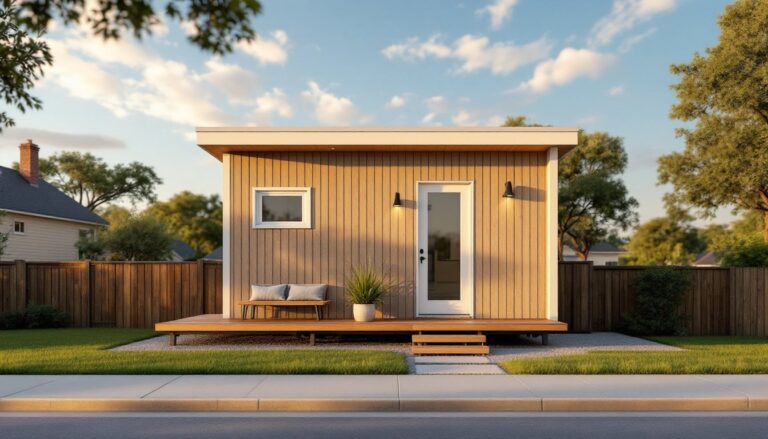
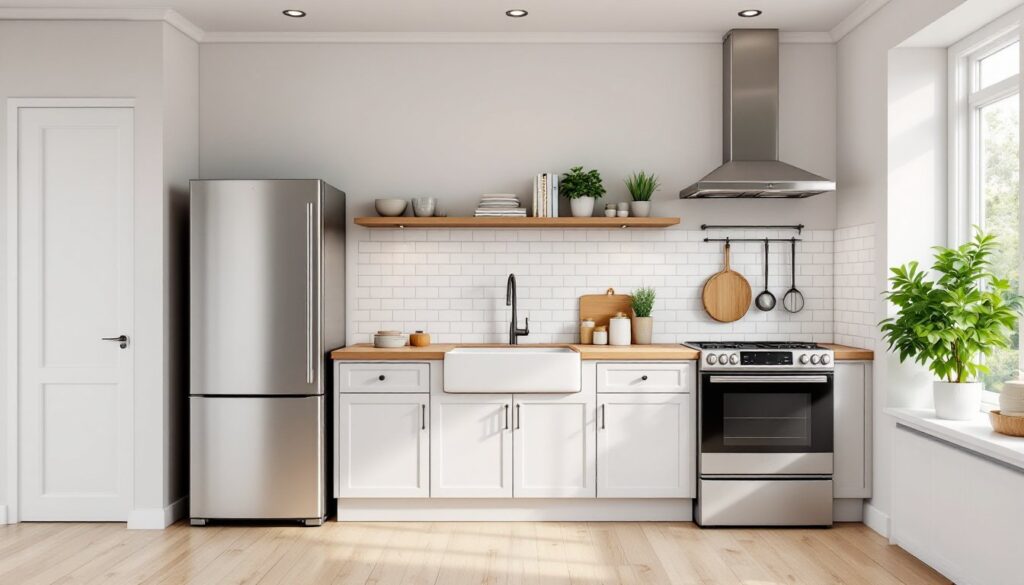
A single-wall kitchen positions all appliances, cabinets, and counter space along one linear wall. This layout works best in spaces 8 to 15 feet long and is common in studios, lofts, and mobile homes. The main advantage is workflow simplicity, everything is within arm’s reach, and you don’t waste steps moving between stations.
The single-wall design also minimizes plumbing and electrical runs, reducing installation costs compared to L-shaped or U-shaped kitchens. If your tiny kitchen is part of an open floor plan, a single wall keeps the cooking zone compact and visually unobtrusive, preserving sightlines to the rest of the space. This layout does require careful planning to avoid cramping appliances or sacrificing counter real estate, but the trade-off is worth it in small footprints.
One drawback: you’ll have less counter workspace than a larger kitchen, so smart storage and organizational systems become non-negotiable. Resources like 10 Easy Pieces: Compact One-Wall Kitchens showcase examples of sleek, minimalist single-wall designs that prove the layout can look polished and intentional, not makeshift.
Essential Elements: The Work Triangle and Appliance Placement
The work triangle, the path between sink, stove, and refrigerator, remains foundational to kitchen efficiency, even in a single-wall layout. In a traditional kitchen, these three points form a triangle with sides of 4 to 9 feet. In a one-wall kitchen, they’re stacked linearly, so the goal is to keep the distance manageable and the sequence logical.
Typical placement runs refrigerator, then prep/sink zone, then cooking appliance, left to right (or right to left, depending on your preference and handedness). This order mimics the actual workflow: pull out ingredients, prep and wash, cook. Keep at least 24 inches of counter space on each side of the sink and 18 inches beside the stove for safety and usability. If you have a dishwasher, position it adjacent to the sink to minimize water line runs and create a logical cleanup zone.
Appliance dimensions matter. A standard refrigerator is about 30 inches wide (36 inches with hinges open), a 30-inch range requires counter clearance, and a 24-inch or 30-inch sink base occupies the middle. Total recommended wall length for a functional single-wall kitchen is 9 to 12 feet, though compact kitchens can work in 8 feet if you use compact appliances (24-inch fridge, apartment-size stove).
Optimizing Your Work Triangle in Compact Spaces
In ultra-tight kitchens, sacrifice counter space strategically rather than compressing the triangle. A smaller counter to the left of the sink (for prep) and minimal counter to the right of the stove (for plating) is better than squeezing everything into 18-inch zones. If counter space is genuinely scarce, add a mobile cart or fold-out drop-leaf table adjacent to the kitchen to extend prep real estate without taking permanent footprint.
Consider a cooktop without an oven (a slide-in or drop-in electric cooktop, about 30 inches wide) and rely on a wall-mounted microwave or convection oven above for baking. This frees up counter depth and creates a more ergonomic work line. Vertical appliances, stackable ovens, wine coolers, or specialty units, can occupy wall space above the main counter line rather than competing for the finite linear footage below.
Storage Solutions That Maximize Every Inch
Counter clutter kills tiny kitchens. With limited surface area, every inch stored vertically or hidden behind cabinet doors buys you practical workspace. Start with deep, full-height cabinetry along your single wall. A 36-inch-tall base cabinet plus 24-inch-deep upper cabinets (or open shelving) uses every inch of vertical real estate without eating into floor area.
Behind-the-door storage, hooks, magnetic strips, or shallow shelves affixed to cabinet interiors, corrals items like cutting boards, measuring spoons, or kitchen towels that would otherwise clutter counters. Under-sink organizers (adjustable shelving, pull-out drawers, or tiered racks) make that awkward space functional without wasting it on dead air.
Don’t overlook the wall above your backsplash. A 12- to 18-inch gap between counters and upper cabinets is prime real estate for floating shelves, pegboards, or rail systems that hold small jars, spices, or frequently used tools. A stainless steel or black powder-coated peg board keeps things accessible and visually clean. Alternatively, magnetic spice jars or adhesive wall-mounted magnetic strips hold metal containers without visible hardware.
For appliances, think removable or collapsible: a toaster, coffee maker, or hand mixer on a pull-out shelf inside a cabinet door stays out of sight until needed. A collapsible colander or mixing bowl saves drawer space. Under-counter drawers (rather than traditional cabinets with swing-out doors) free up the walkway in a linear kitchen, you don’t need clearance for a door swing.
Vertical Storage and Open Shelving Ideas
Open shelving works in tiny kitchens if you’re disciplined about what you display. Install stainless steel shelves or simple wooden floating shelves (typically 10 to 12 inches deep) above the counter or in any wall gaps. Keep them styled: a mix of cookbooks, small plants, stacked bowls, and labeled jars looks intentional rather than haphazard. Open shelving also creates the illusion of more space because it doesn’t block sightlines the way solid upper cabinets do.
A wall-mounted stainless steel rail system or kitchen rod hung at 60 inches above the floor lets you hang cups, small strainers, or kitchen linens using S-hooks or clips. This approach borrows from restaurant kitchens: everything in sight and within reach. Corner shelves and swing-out corner carousel units (like a Lazy Susan, but vertical) reclaim dead space in tighter layouts.
For truly minimal footprints, a small kitchen organization guide emphasizes vertical pantry-style shelving in an adjacent closet or wall nook, keeping dry goods and small appliances off your main kitchen wall. This mental shift, treating a tiny kitchen as a prep station rather than a storage depot, frees you from trying to cram everything into 9 feet of linear space.
Lighting and Color Strategies to Enhance Perception of Space
Tight kitchens feel cramped under dim or yellow-tinted lighting. Aim for 3000K to 4000K color temperature (neutral to cool white) with at least 30 to 40 foot-candles of light on the work surface. Recessed downlights or a small track light system mounted on the ceiling delivers even illumination without eating into cabinet or counter space. If a fixture must live on the wall or under a cabinet, choose slim LED under-cabinet lights (about 1 inch tall) that shed light directly on counters without visual bulk.
Additional accent lighting, a small pendant or wall sconce above the prep zone, adds visual interest and breaks the monotony of a single bright ceiling fixture. Keep fixtures minimal and low-profile: a chandelier or oversized pendant crowds the visual space in a tiny kitchen.
Color is a psychological lever in small spaces. White, light gray, or soft cream on cabinets and walls reflects light and makes the kitchen feel larger. A bold accent wall or dark lower cabinets with light uppers can work if you balance with strong lighting and open shelving to maintain airiness. Avoid cabinets and walls in heavy colors without bright, strategic lighting, the space will feel smaller and darker.
Countertops in light solid colors (white quartz, light butcher block, or pale laminate) and a light subway or ceramic tile backsplash amplify the sense of openness. A reflective or glossy finish on backsplash tiles bounces light and adds subtle depth. For floors, light-toned luxury vinyl plank (LVP) or pale laminate works well, easier to maintain and warmer underfoot than tile in a small space.
Finally, minimize visual clutter on the wall itself. Open shelving or glass-front cabinets display only essentials: solid doors and drawer fronts hide the rest. A single statement color in cabinet hardware or a thin edge-grain detail keeps the design cohesive without visual noise. Design resources like Apartment Therapy’s small space tips show how strategic color palettes and lighting turn cramped kitchens into inviting hubs.
Conclusion
A single-wall kitchen succeeds when you respect its constraints and work with them, not against them. Optimize the work triangle, eliminate dead space with vertical storage, and use light and color to expand the perceived room. A well-designed tiny kitchen is efficient, pleasant, and often more functional than oversized kitchens where cooks waste steps and forget where things live. Start with honest measurements, prioritize workflow, and invest in smart storage, the rest is finishing touches.